Step By Step Drawing Of An Owl
Step By Step Drawing Of An Owl - Draw the eyes and wings. In this first step, there are a few tools that will make it much easier. Add the owl’s feathers that appear as eyebrows. Let's draw an owl step by step. Draw the shape for the wing, and add a tree branch where the owl is standing. Start by drawing a curved line for the top of the head. Lightly draw a small oval for the head. These must be drawn using a 4h to 6h pencil, because they need to be light and easily erased. Download your free marker guide. Now, add curved lines to block the flat face, which will help place the facial features. Then, draw the ears to look like two triangles, as you can see in the picture. Then attach an overlapped larger oval at a slight angle for the owl’s body. Draw the nose of your owl. Make it rounded on the sides with an upwards curve at the bottom/middle. Draw the base ovals for the owl's head and body. Now, add curved lines to block the flat face, which will help place the facial features. The body’s construction is a very simple step. Today, we’ll be talking about how to draw an owl. Web how to draw an owl. For this step, if you have a lighter pencil that would be best, as we will be erasing these lines. Web how to draw an owl. Continue with the feet, drawing two small round shapes. Add the owl’s feathers that appear as eyebrows. Then, draw the ears to look like two triangles, as you can see in the picture. 16k views 5 years ago animal drawings. Add the owl’s feathers that appear as eyebrows. Draw in the other foot, and the two eye backgrounds. Make it rounded on the sides with an upwards curve at the bottom/middle. Sketch the feet, beak, and second wing. Draw the base ovals for the owl's head and body. Add simple shapes to your owl drawing to fill out the outline. 63k views 1 year ago how to draw animals. This tutorial is perfect for artists of all skill levels. Next, draw vertical and horizontal lines inside the head oval, into 4 sections. Begin by drawing the top of the owl’s head and first ear. Let's draw an owl step by step. Draw the outline of the eyes. Continue with the feet, drawing two small round shapes. Learn how to draw a realistic owl! Draw the eyes and wings. Then, draw the ears to look like two triangles, as you can see in the picture.
How to Draw an Owl Easy Tutorial Tutorial, by Simon Alexander Owls
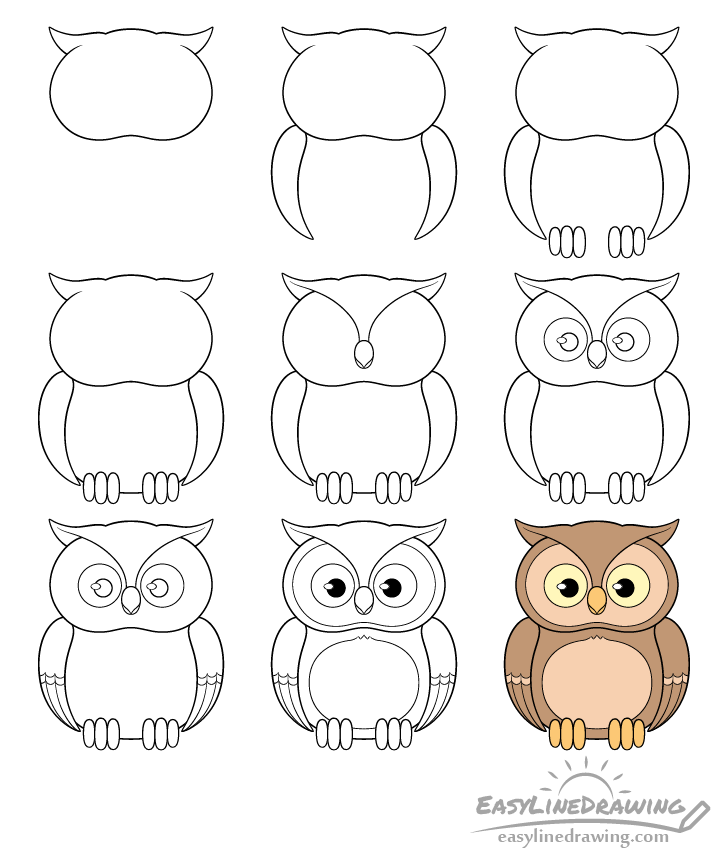
How to Draw an Owl Step by Step EasyLineDrawing
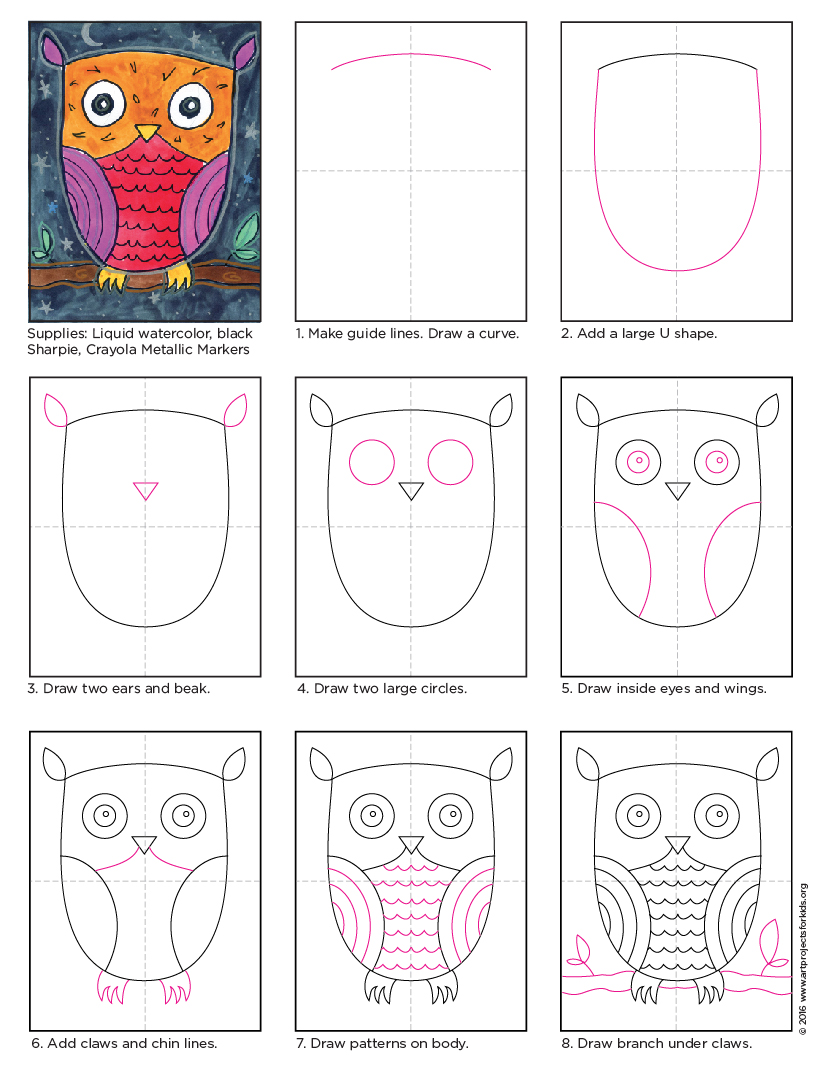
How to Draw an Owl Art Projects for Kids
Draw The Back And Wing.
Today, We’ll Be Talking About How To Draw An Owl.
This Will Look Like A Short Apple With Two Curved Lines On The Top And A Rounded Bottom.
Start By Drawing A Curved Line For The Top Of The Head.
Related Post: