Simple Drawing Of Mickey Mouse
Simple Drawing Of Mickey Mouse - Mark off the width and height of the picture. Draw two ovals for mickey’s head and body. Also included is a downloadable version of this classic disney drawing tutorial. The black lines highlight the lines you’ve drawn in the previous. Get free printable coloring page of this drawing. Draw two lines, which will act as the center of his body and head. Web today i'll be showing you easy to follow steps on how to draw mickey mouse from disney. Next, add 2 smaller ovals inside of the eyes for the pupils. Add an oval for a nose. By following the simple steps, you too can easily draw a perfect mickey mouse. Outline mikey’s legs and arms. Web how to draw mickey mouse. Next, add 2 smaller ovals inside of the eyes for the pupils. Add an oval for a nose. Perfect for kids and beginners, this drawing tutorial will help you draw a great looking mickey mouse fast. The red lines represent the current step of your drawing. Follow along with us as we guide you through each step of the. Web in this video, we're going to show you how to draw a cute and simple version of mickey mouse, our favorite disney character. By following the simple steps, you too can easily draw a perfect mickey. Your kids can learn how to draw mickey mouse by following the images in this basic lesson. Web in this video, we're going to show you how to draw a cute and simple version of mickey mouse, our favorite disney character. Web how to draw mickey mouse. The black lines highlight the lines you’ve drawn in the previous. Draw two. Draw a smile under mickey’s nose and place a cheek line at each end. Web how to draw mickey mouse. Web in this video, we're going to show you how to draw a cute and simple version of mickey mouse, our favorite disney character. Draw two ovals for mickey’s head and body. The black lines highlight the lines you’ve drawn in the previous. Follow along with us as we guide you through each step of the. Here’s a quick rundown on how to interpret our guide: Also included is a downloadable version of this classic disney drawing tutorial. By following the simple steps, you too can easily draw a perfect mickey mouse. Web to draw mickey mouse, first draw an oval in the middle of your page for his nose. Web today i'll be showing you easy to follow steps on how to draw mickey mouse from disney. Get free printable coloring page of this drawing. Next, add 2 smaller ovals inside of the eyes for the pupils. Add 2 ovals on top of the curved line for mickey's eyes. Your kids can learn how to draw mickey mouse by following the images in this basic lesson. The red lines represent the current step of your drawing.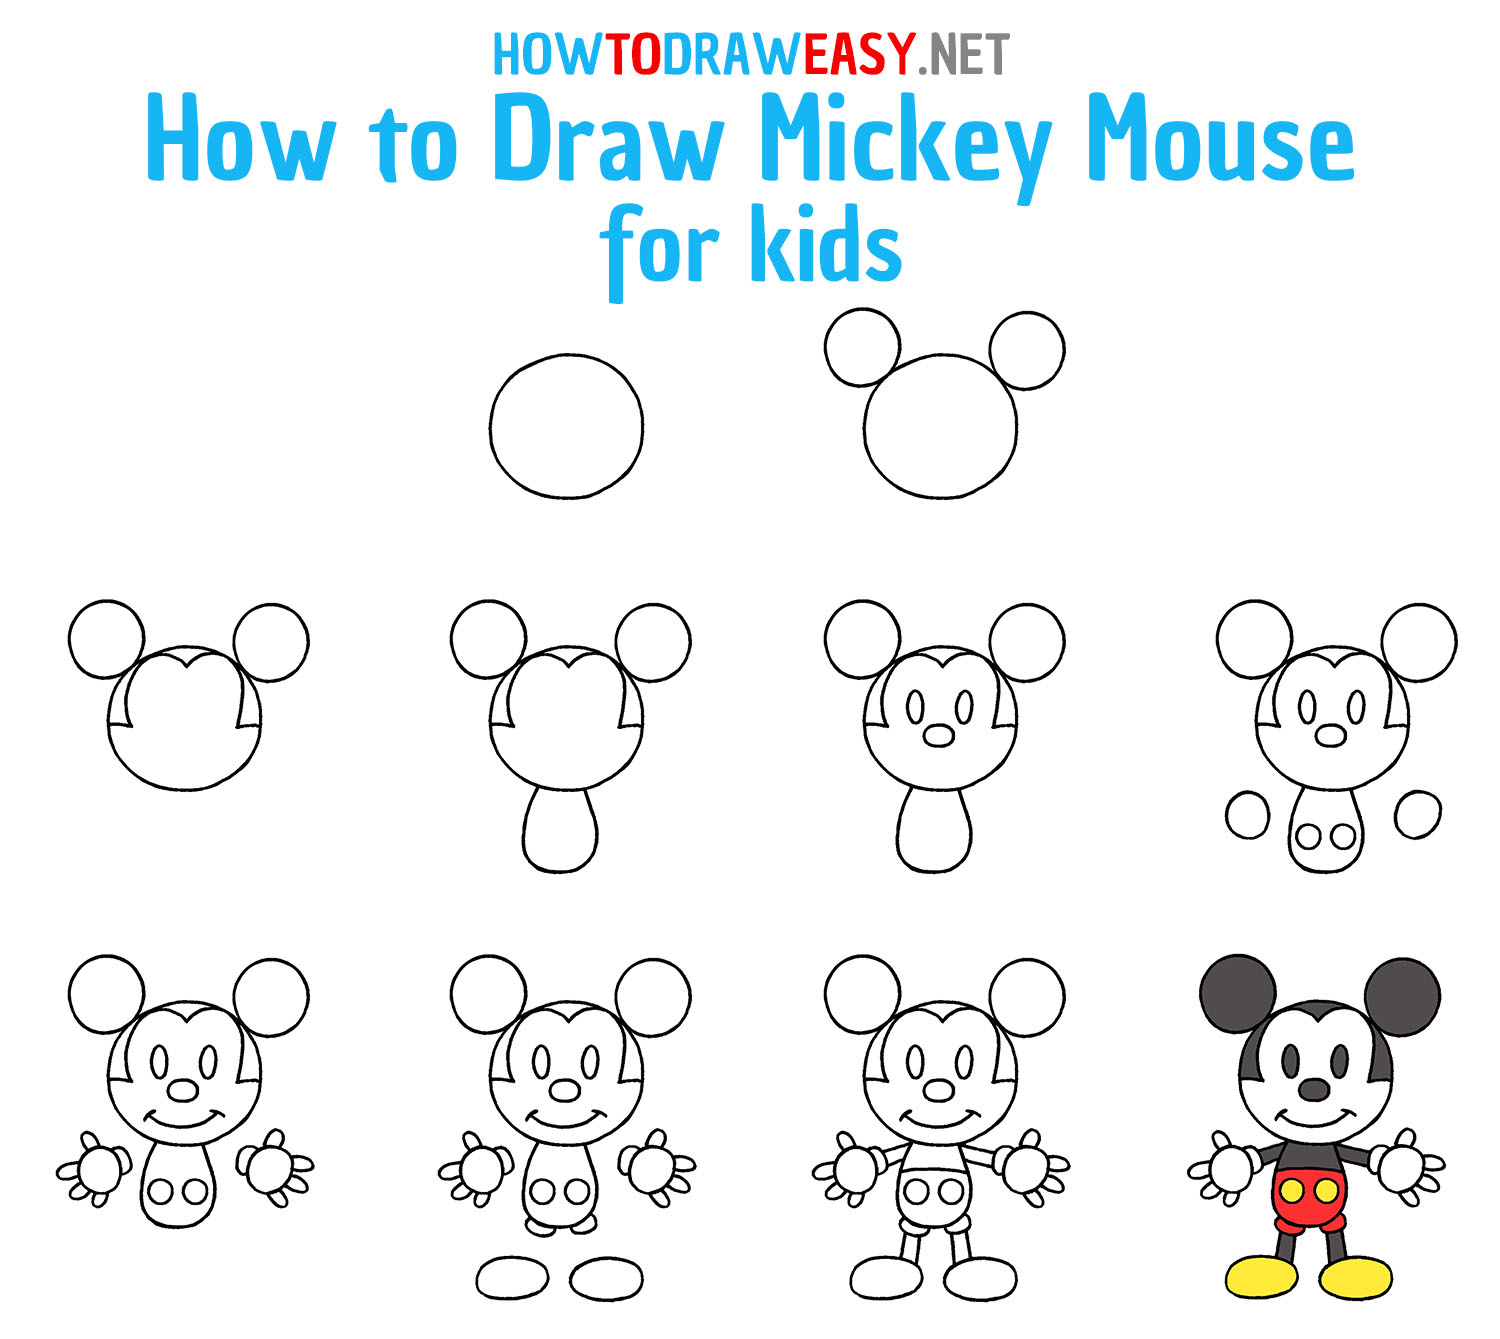
Step By Step Mickey Mouse Drawing Easy Krysten
How To Draw Mickey Mouse Mulberry

3 Ways to Draw Mickey Mouse wikiHow
2.8M Views 9 Years Ago.
Then, Draw A Curved Line Slightly Above The Nose.
The Symmetrical Pose Of His Character Will Make Thing Much Easier To Draw.
With Two Smooth Lines, Define The Shape Of The Legs And The Body.
Related Post: