Pumpkin Drawing Step By Step
Pumpkin Drawing Step By Step - Draw two identical curved lines that point in opposite directions like a mirror image. I hope you enjoy these ideas as you dive into your pumpkin drawing project this fall. With smooth lines, mark the ribs. Add a smiling mouth below. Draw two large, round eyes near the top of the pumpkin. Connect the end points on top and bottom by drawing 3 arches between the end points (3 on top and 3 on the bottom). Continue using long curved lines to enclose rounded ribs until the pumpkin has a round, full shape. Draw a large vertical rectangular shape. Leave a little opening at the top for the stem. Create your festive masterpieces with these easy instructions. Web learn how to draw a pumpkin step by step. With smooth lines, mark the ribs. Web pumpkin drawing step 1. Connect the dots 3 times. This will be the base of the stem. Web this step by step tutorial explains how to draw and shade a realistic looking pumpkin with pencil drawing examples for each step. Their pumpkin shape makes them the perfect subject matter for so many different fall (and halloween) projects! Take a look at the middle arch on top and on the bottom. Draw a curved line on the left. How to light your pumpkin. Here's a picture to demonstrate each step of the pumpkin easy drawing: Join the email list so you don't miss exclusive 2d animation courses: How to draw a pumpkin from imagination: Web pumpkin drawing simple step by step. You can see a preview of the drawing steps in the example above. Leave a little opening at the top for the stem. Here's a picture to demonstrate each step of the pumpkin easy drawing: Continue using long curved lines to enclose rounded ribs until the pumpkin has a round, full shape. Start small at the top and make it bigger as you go down. Join the email list so you don't miss exclusive 2d animation courses: Mark off the width and height of the picture. Draw two large, round eyes near the top of the pumpkin. Web step by step pumpkin drawing instructions. It involves only a few simple shapes and is a lot of fun. Web pumpkin drawing tutorial: How to draw pumpkin in easy steps for beginners lesson.tutorial of drawing technique. Draw a circle connecting the two lines. Draw the vine with a squiggly line. This will be the base of the stem. Begin by drawing a long standing oval shape and then add two more partial oval shapes on either side.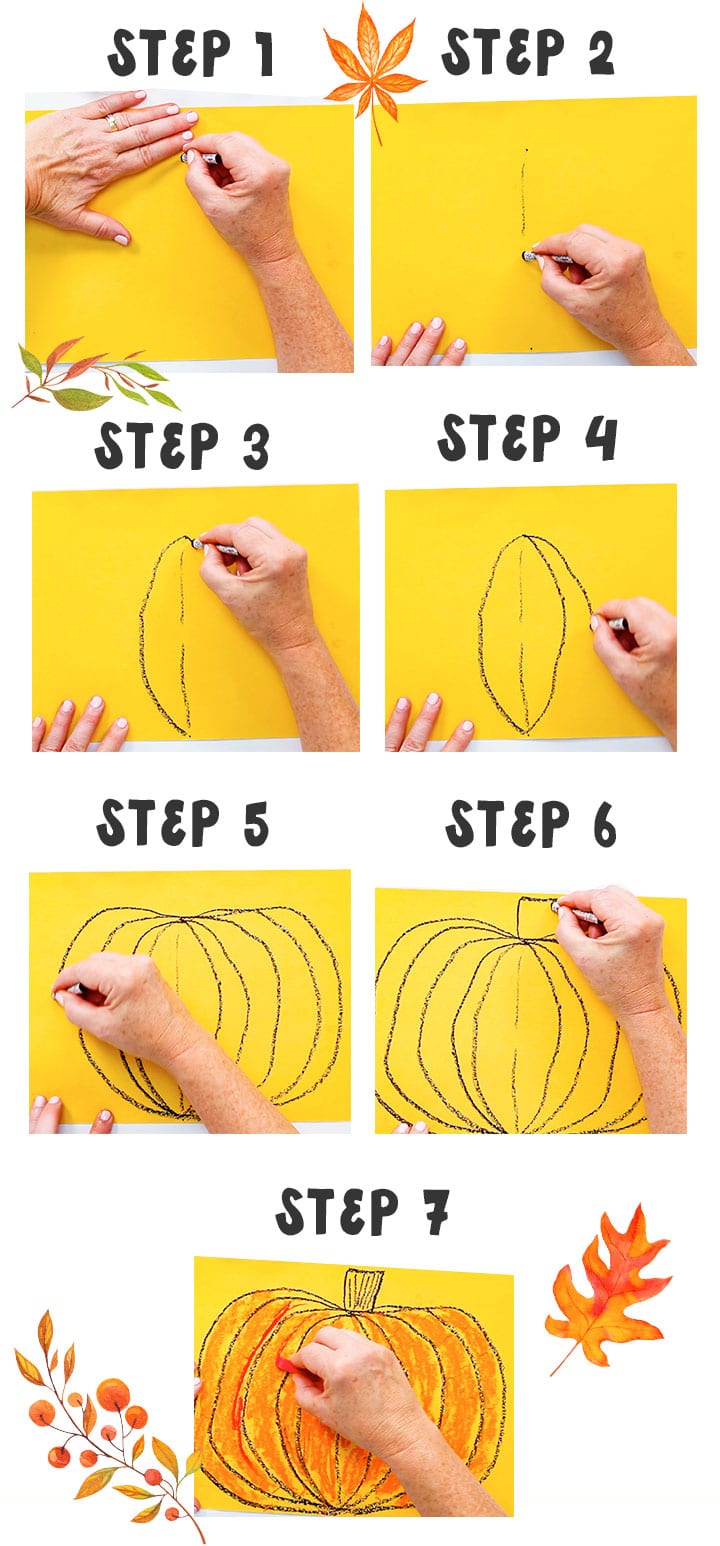
How to Draw an Easy Guided Pumpkin Deep Space Sparkle
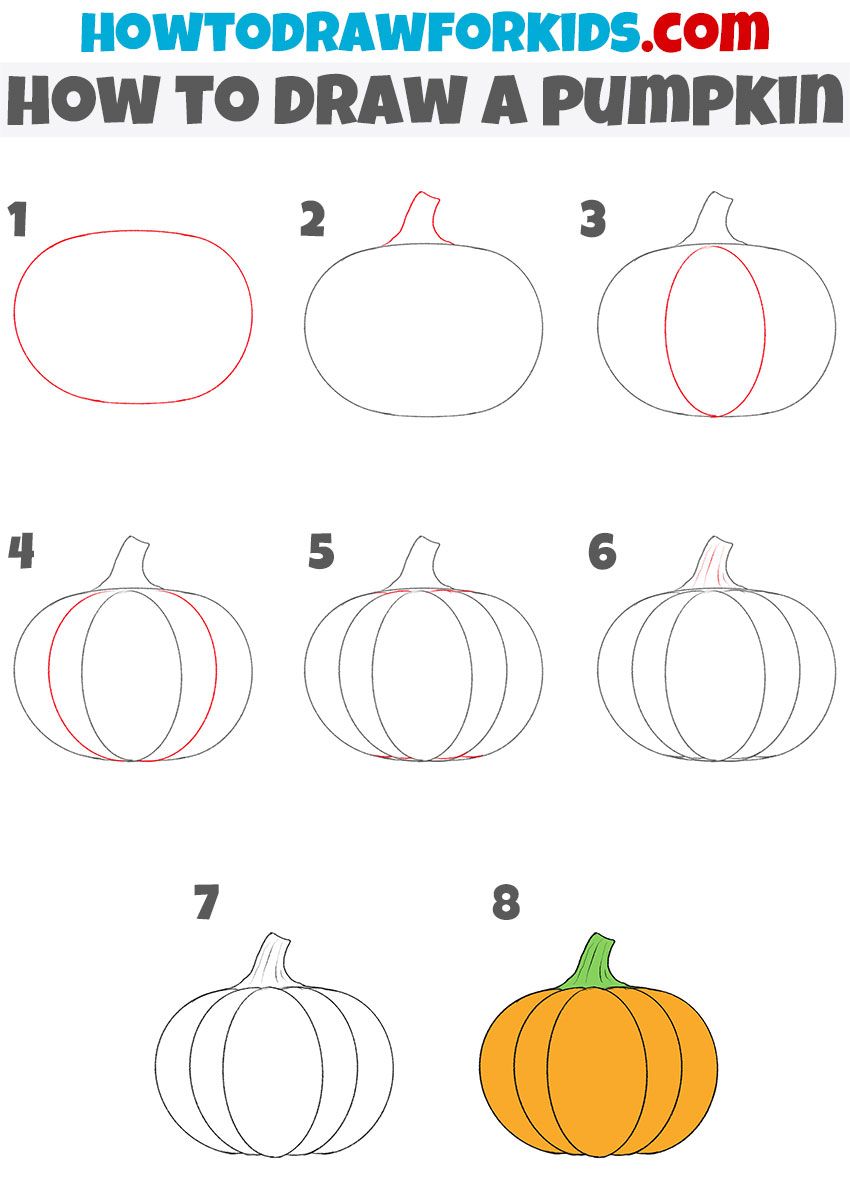
How to Draw a Pumpkin Easy Drawing Tutorial For Kids

How to draw pumpkin step by step The Smart Wander
Add A Tail To Your Pumpkin By Drawing A Curved Shape.
How To Draw A Pumpkin In Perspective.
Add A Smiling Mouth Below.
Let’s Draw The Outline Of The Pumpkin.
Related Post: