Lips Drawing Step By Step
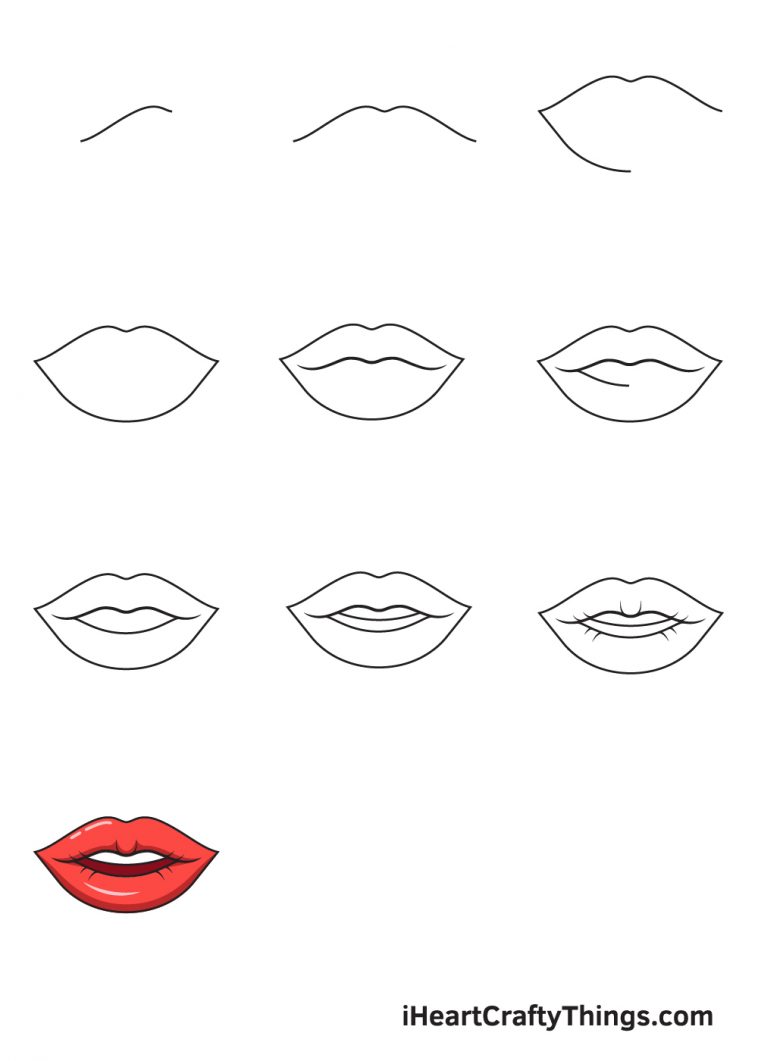
Lips Drawing Step By Step - Draw this line lightly because we’re going to erase it later. Next draw an almond shape around that line so it’s lined up through the center of the shape. Learn how to draw a realistic mouth and lips in this step by step art tutorial drawing for beginners. Web how to draw lips step 1: If you are drawing from a photograph, look at how long the mouth is and how high the mouth is. The materials you’re going to need: Draw a straight horizontal line between the “u” shape and the base of the triangle. This creates the left side of the upper lip. Web how to draw lips step by step. Draw a “v” shape just above the short vertical line we made. If you are drawing from a photograph, look at how long the mouth is and how high the mouth is. Start with a 2h pencil and sketch a rectangle to show the length and height of the top and bottom lip. The shorter the line, the more plump they will be. Draw a long isosceles triangle. Lips are some of. Draw on expert insights to help you sketch the perfect pair of lips. Partway down draw a curve (similar to a “u” shape). The materials you’re going to need: Capture the keys to a lifelike lip drawing. In this easy guide, we'll show you the different ways you can draw your lips and give you advice on shading. There are many ways you can customize your drawing to make it extra unique. Web how to draw lips step by step. Learn how to draw a realistic mouth and lips in this step by step art tutorial drawing for beginners. Sketch a circle with a vertical line in the middle. How to draw lips using pencil for beginners in. The shorter the line, the more plump they will be. The shorter the line, the more plump they will be. Draw a long isosceles triangle. Draw a straight horizontal line between the “u” shape and the base of the triangle. Lips are one of the many features of the face that any artist interested in creating realistic portraits or new characters should master. Decide the length and height of your drawing. Web how to draw lips step by step. Starting from the left side of the middle of your paper, draw a line going upwards. There are many ways you can customize your drawing to make it extra unique, which i'll. This will form the upper lip. When drawing a portrait, lips play a big role, for they can add a lot of emotion to the person you’re drawing. Web circle line art school. Add another perpendicular line just below the middle and extend it slightly beyond the circle. When drawn correctly, the form of the line should look like a slope. Draw this line lightly because we’re going to erase it later. The first step of any drawing is to start with the most basic shapes—regardless of the point of view that you're trying to capture.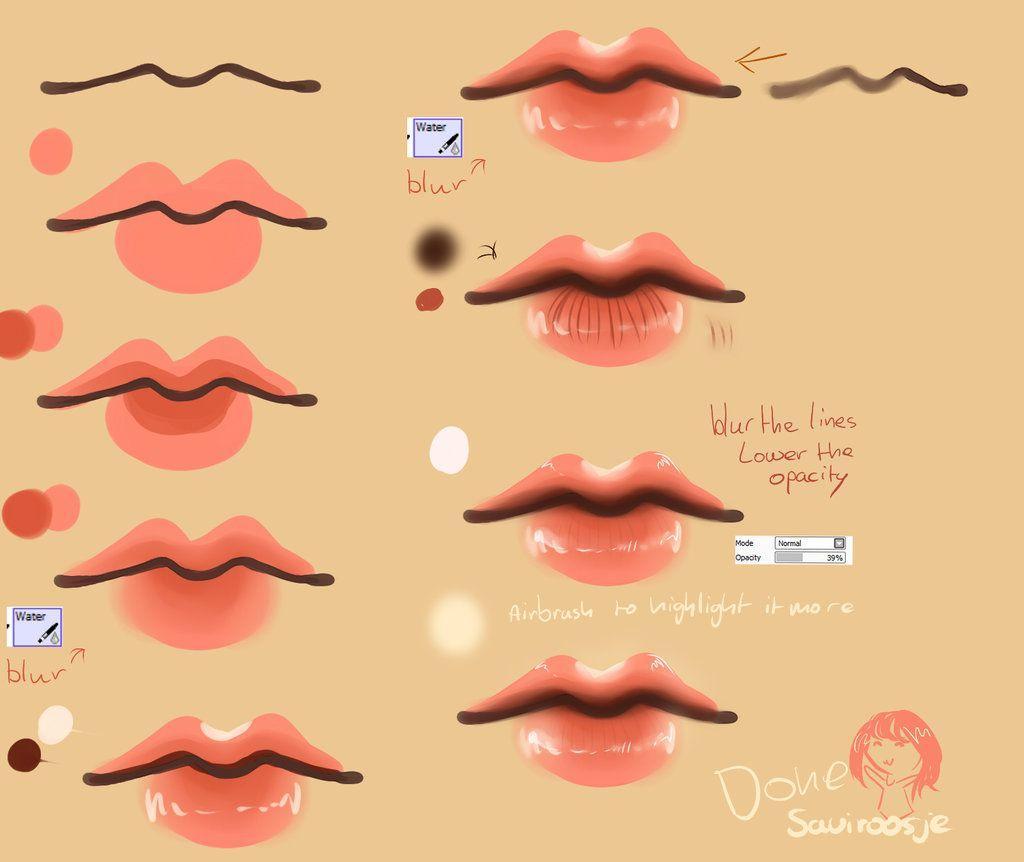
30+ How to Draw Lips for Beginners Step By Step HARUNMUDAK
Lips Drawing How To Draw Lips Step By Step

How To Draw A Lips Step By Step Easy at Drawing Tutorials
Lips Are Some Of The Most Expressive And Varied Facial Features You Can Portray.
Next Draw An Almond Shape Around That Line So It’s Lined Up Through The Center Of The Shape.
This Guide Line Will Aid In Shaping The Upper And Lower Lip, As Well As In Positioning The Point Where The Lips Meet.
Draw A Straight Horizontal Line Between The “U” Shape And The Base Of The Triangle.
Related Post: