How To Draw A Rhino Step By Step
How To Draw A Rhino Step By Step - 35 views 3 weeks ago. Begin by sketching basic shapes for the body and head of the rhino. Then continue drawing the line down and up for the mouth of the rhino. Use a long, curved line to enclose an irregular oval shape. Draw the head and chest. Web 51k views 3 years ago animal drawings. Finally, draw in the face detail and the second set of legs. Start by drawing a wavy line for the top of the head. Connect the two ovals with a curved line to indicate the neck. Web do you want to learn how to draw a rhino ( rhinoceros )easy for beginners. Draw the eyes, mouth and ears. Web if you have the right guide to follow, however, it can be made much easier! Then continue drawing the line down and up for the mouth of the rhino. Begin by lightly sketching the basic shapes that make up the body of a rhino. This quick tutorial shows how to draw a rhinoceros. Then draw a petal shape for the ear on that wavy line as well as a cone shape for the horn at the front of the head. Sketch the underside of the rhino’s belly. Draw the outline of the rhinoceros’ head. ⭐ become a club member and get instant access to exclusive tutorials that will help. This one has two. Draw a large, curved horn on the top of the rhinoceros’s head. Begin by lightly sketching the basic shapes that make up the body of a rhino. Next, draw a small circle above the mouth to form the nose. Using curved lines, draw a shape that looks like a slightly curved oval. Draw the head and chest. Begin with an oval shape for the head, from the front of the oval, extend a slightly curved line downward to create the rhinoceros’s snout. Next, you draw 2 horns. Draw in two of the rhino’s legs. This will become the rhinoceros' head. ⭐ become a club member and get instant access to exclusive tutorials that will help. Please note that this is a short but somewhat advanced tutorial. Get ready to embark on an artistic adventure as we learn how to draw and marker color the magnificent rhinoceros. The head of your rhinoceros drawing; Add another shape shown for the head. Draw a curved line that continues the outline of the rhinoceros’ head. Define the legs and forelegs. From their distinctive horn to their armored body, we’ll guide you through each detail to create a realistic depiction of these massive animals. Ready, get your pencils, go! Then continue drawing the line down and up for the mouth of the rhino. Using curved lines, draw a shape that looks like a slightly curved oval. Add a tail and leg details.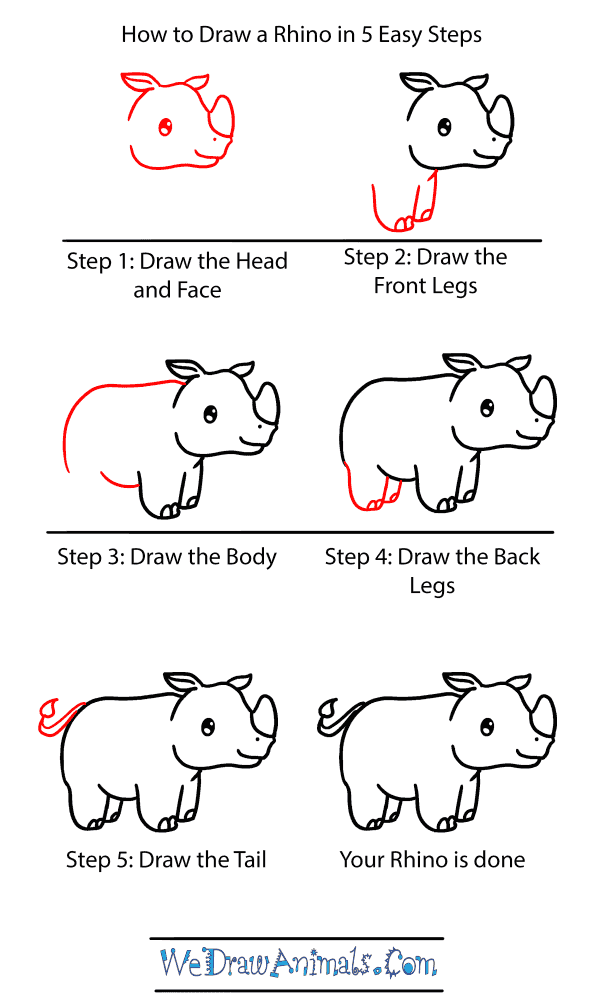
How to Draw a Baby Rhino

How to Draw a Rhino Really Easy Drawing Tutorial
How to Draw a Rhino step by step easy
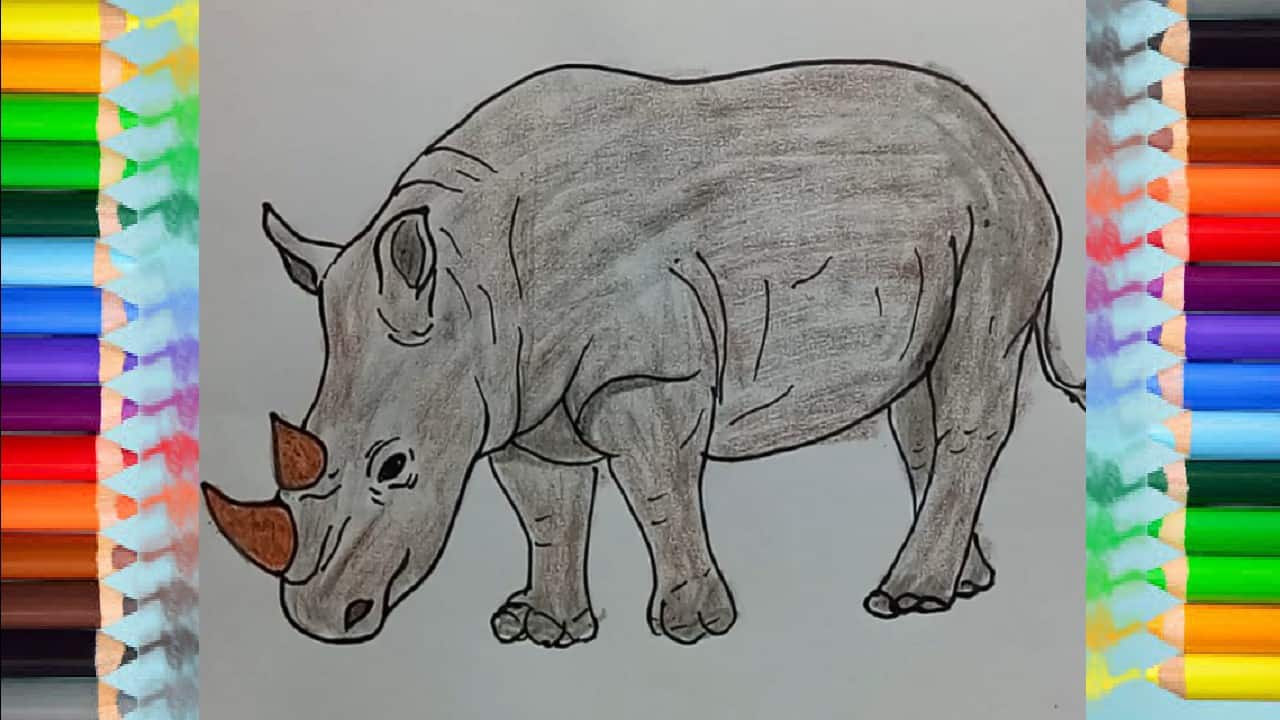
Attach The Tusks And Ears.
It's Super Easy Art Tutorial For Beginners, Only Follow Me Step By Step, If You Ne.
This One Has Two Horns.
Don’t Forget To Draw Eyes, Nose And Mouth.
Related Post: