Drawings Of Braids
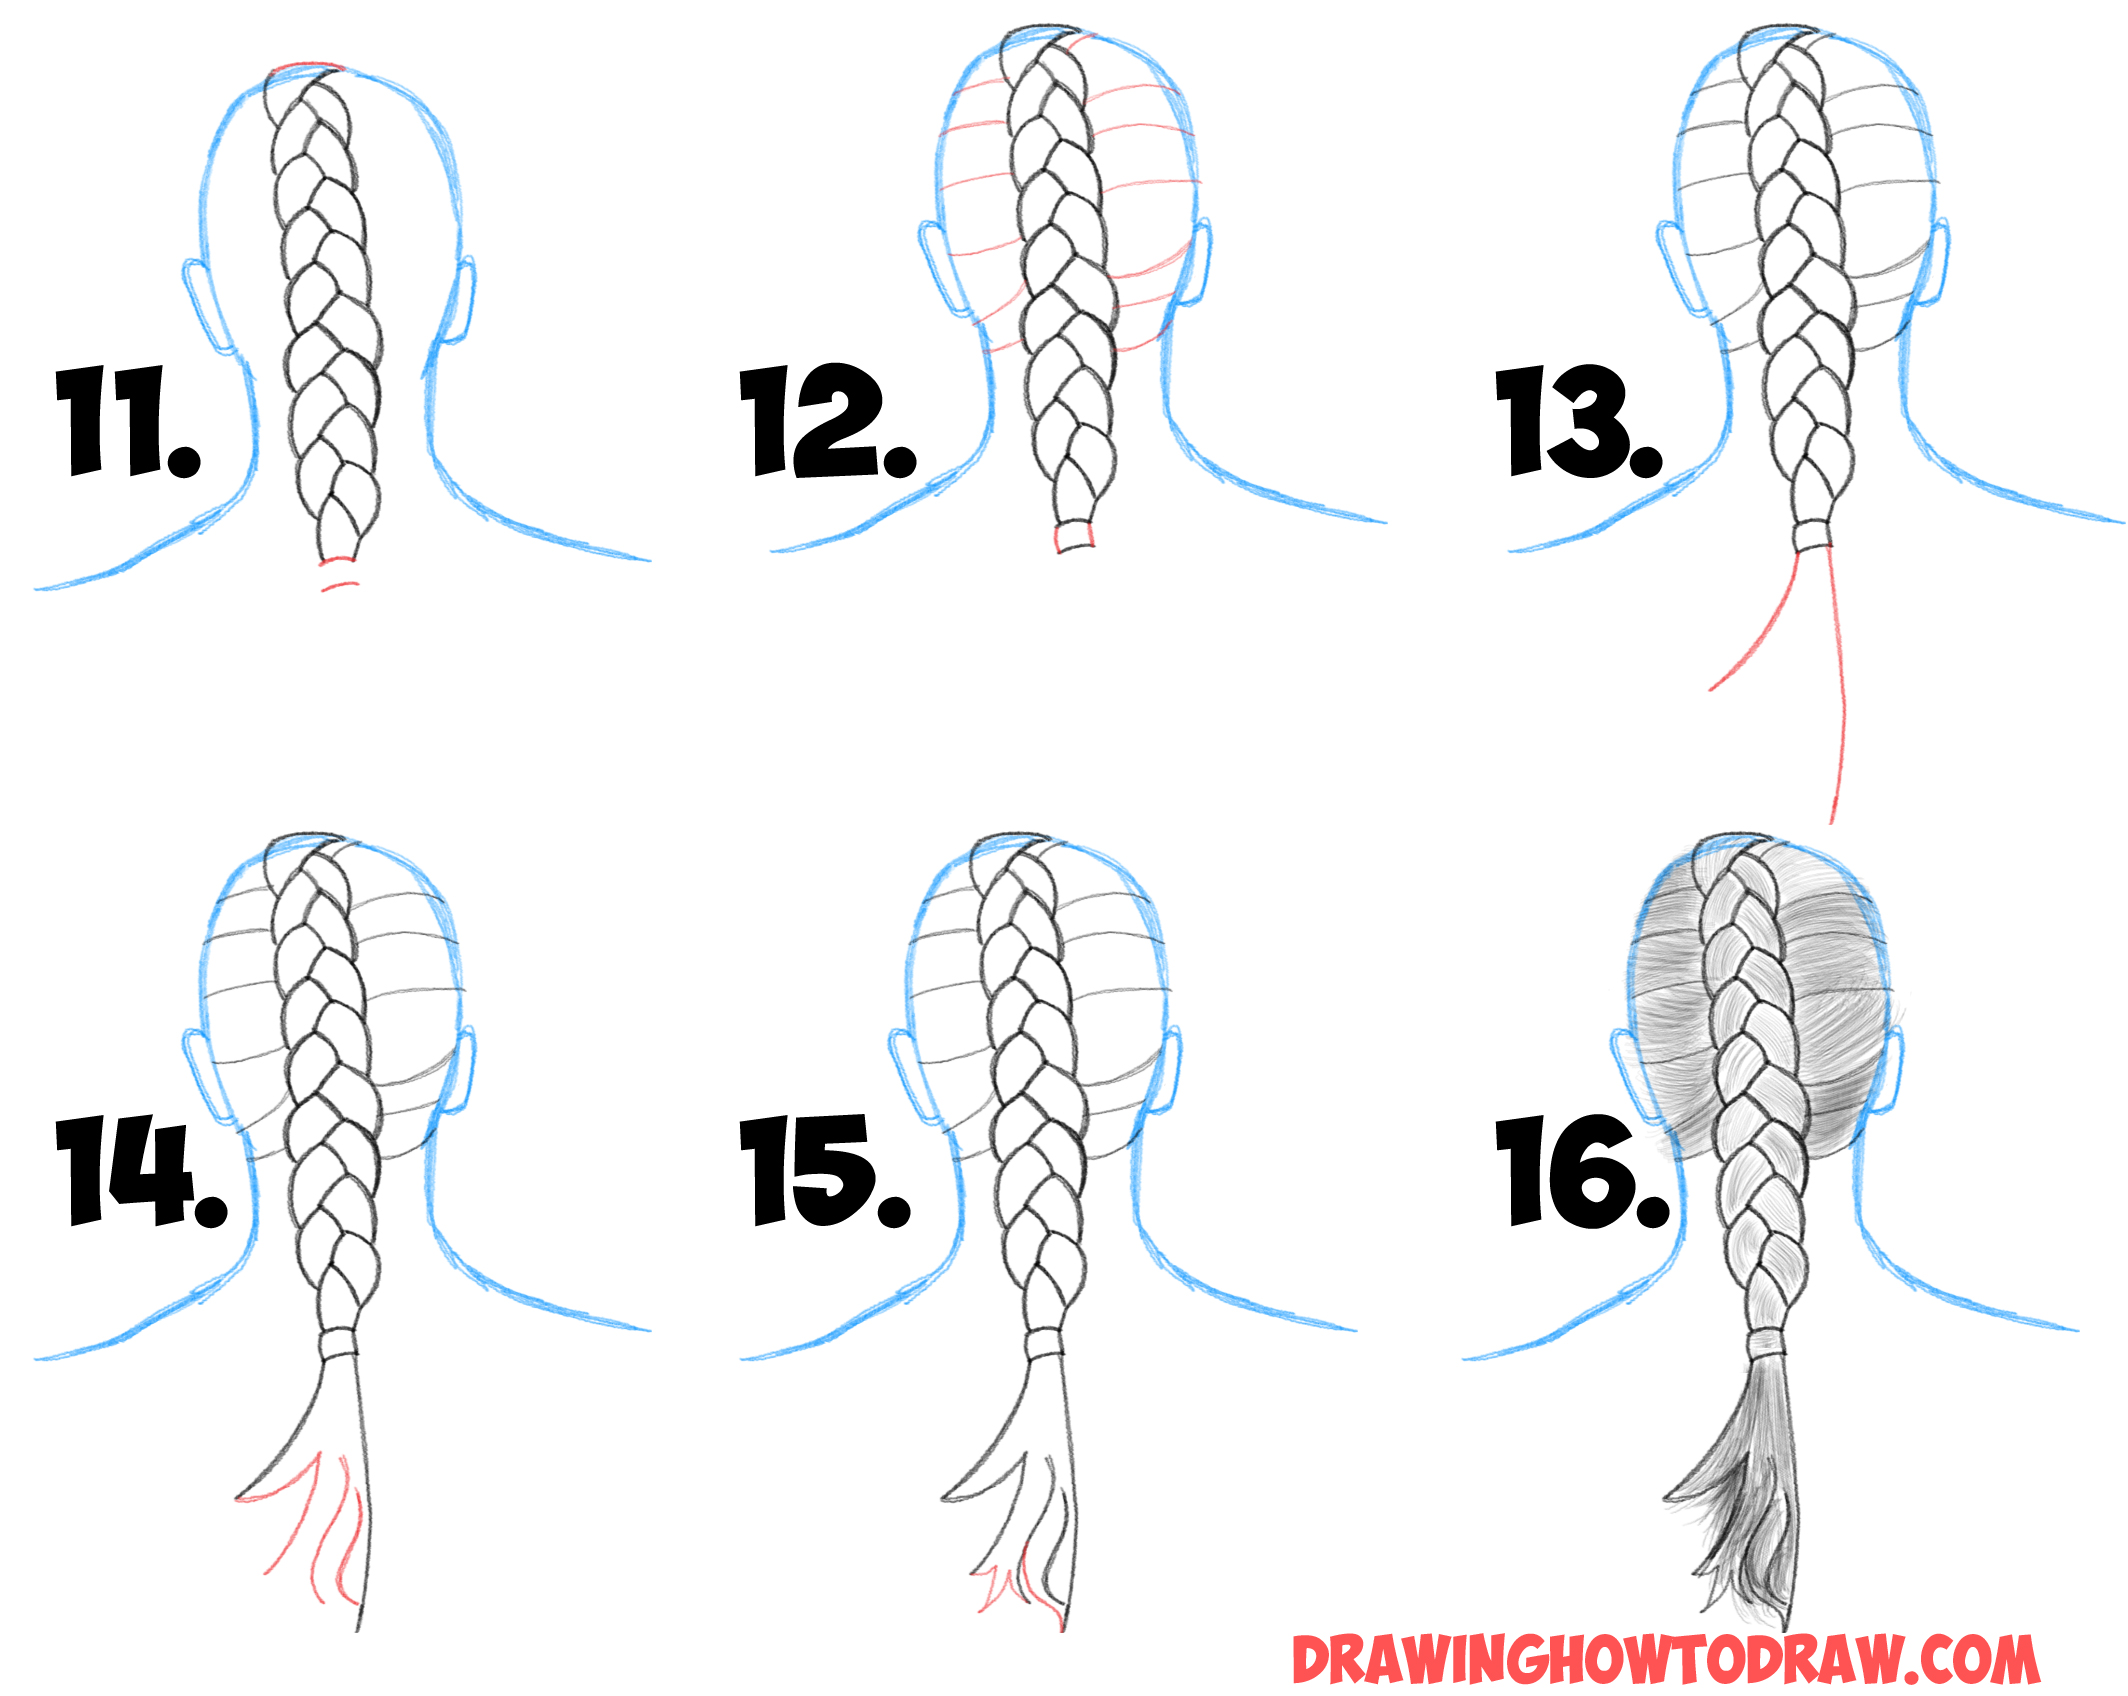
Drawings Of Braids - Dividing the hair into sections. For this step, we are going to split our canvas into four equal parts. This will outline the head to which the braid is attached. Web there are many different types of braids to choose from, and they can be drawn in a variety of ways. So, how to draw a pigtail further? I have created a free worksheet that you can grab below and print out to help you practice ^.^ 4 simple steps to. Draw with me and learn how to draw realistic braid! The basics of drawing hair. Web the art of braid: Curved lines make it more interesting and lifelike. In this blog post, we will show you how to draw ten different types of braids step by step. The individual strands that make up a braid. Using your guidelines, draw a rectangle that falls in the middle of them, as shown in the diagram. Drawing the first section of the braid. In a typical braid, there are three strands,. For this step, we are going to split our canvas into four equal parts. Begin by drawing a circle. Capturing the intricate weave of a braid in a drawing adds a touch of realism to your artwork. Focus on overlapping strands to create depth, and remember, light shading enhances its texture. This will outline the head to which the braid. Creating the second and third sections of the braid. Whether you are a beginner or an experienced anime artist, we hope you will find this tutorial helpful. Along the middle line, draw curvy zigzags all the way down. Draw a decent size oval on top of the horizontal line you drew in the previous step. Sketching some quick guidelines will. All your hair will be sectioned into squares and worked into individual plaits to get this look. Sketching the basic shape of the head and hairline. Creating the second and third sections of the braid. Along the middle line, draw curvy zigzags all the way down. Web easy steps for drawing braids. These 2 lines will mark the thickness and length of your braid. Drawing the first section of the braid. Using your guidelines, draw a rectangle that falls in the middle of them, as shown in the diagram. Step by step, drawing a braid becomes simple. Dividing the hair into sections. Web how to draw a braids (1 option) first of all, designate its basis, determine the length. Curved lines make it more interesting and lifelike. Capturing the intricate weave of a braid in a drawing adds a touch of realism to your artwork. In this video, i'm going to show you an easy way to draw realistic braids. Remember, don’t press too hard with your pencil at this stage, as you may need to make adjustments later on. Remember, the beginning of the spit is thicker than the middle, and the tip should remain thinner to the edge.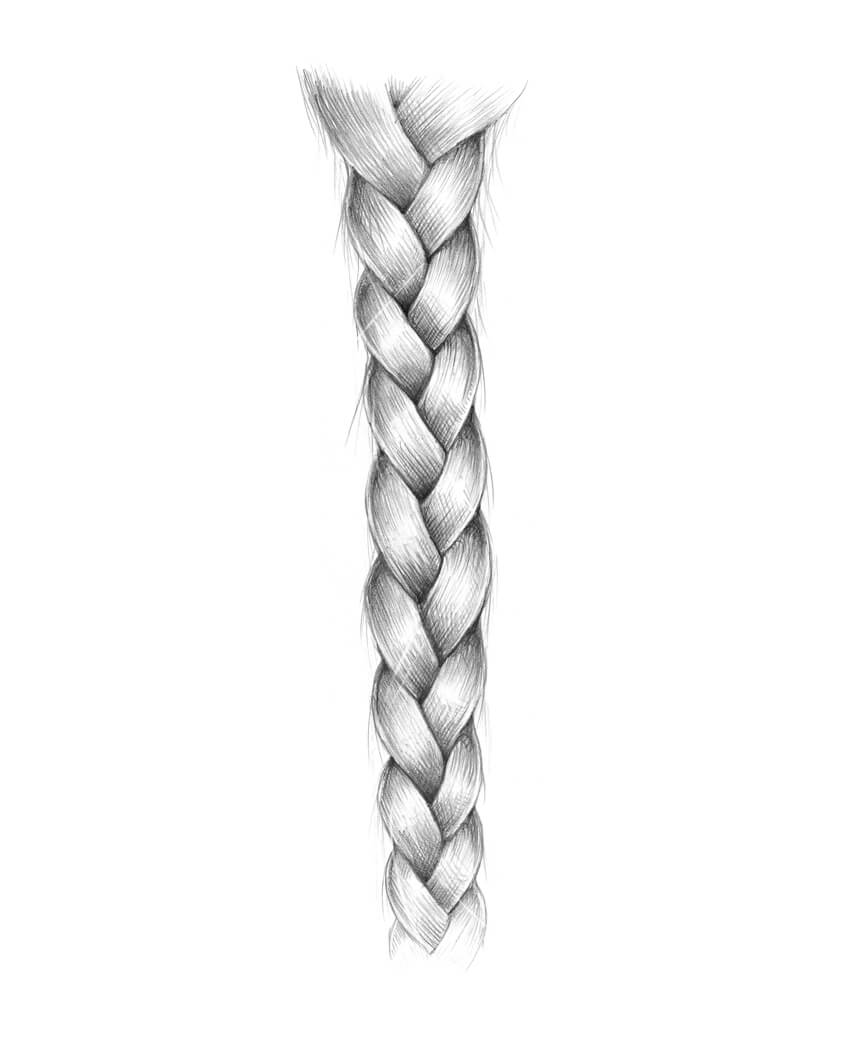
20+ Trends For How To Draw Hair Braids
How to Draw Braids with Easy Step by Step Drawing Tutorial How to

How to draw a braid How to draw braids, How to draw hair, Ponytail
Gesture Refers To The Flow Of One Line Into Another.
You Can Try Your Hand At Doing This At Home, Using A Comb To Divide Each Section, Gel For Twisting And An Elastic Band To Secure The Ends.
Adding The Center Parting And Guideline For Braiding.
This Creates The Distinct Pattern Of A Braid.
Related Post: